
IP geolocation data is not available in Google Tag Manager by default. GTM can fire tags, manage pixels, and push events into the data layer, but it has no built-in way to resolve a visitor's IP address to a country, city, or region.
That's a problem if you need to run geo-targeted ad tags, personalize content by location, filter internal traffic, or comply with region-specific consent rules. Adding geolocation tracking to GTM requires an external API, and this tutorial shows you how to set it up.
This tutorial walks through setting up the official IP Geolocation custom template in Google Tag Manager. The template connects to the IP Geolocation API, fetches location and IP data for each visitor, and pushes it into the data layer where you can use it for triggers, variables, and tag logic.
TL;DR
- Install the IP Geolocation template from the GTM Community Template Gallery
- Enter your API key (free tier: 1,000 credits/day) or leave it blank on paid plans with Request Origins configured
- The template pushes a
geoDataobject into the data layer with IP, country, city, coordinates, currency, timezone, and more - Create Data Layer Variables to access individual fields like
geoData.location.country_nameorgeoData.ip - Use a Custom Event trigger on the
geoLocateevent to fire geo-dependent tags
The template handles the API call, caches results in session storage to save credits, and supports both free and paid plan features including security data, user agent parsing, and hostname resolution.
Get Your API Key
You need an API key from ipgeolocation.io to use the template. For a quick start, see the Getting Started with IPGeolocation API Guide.
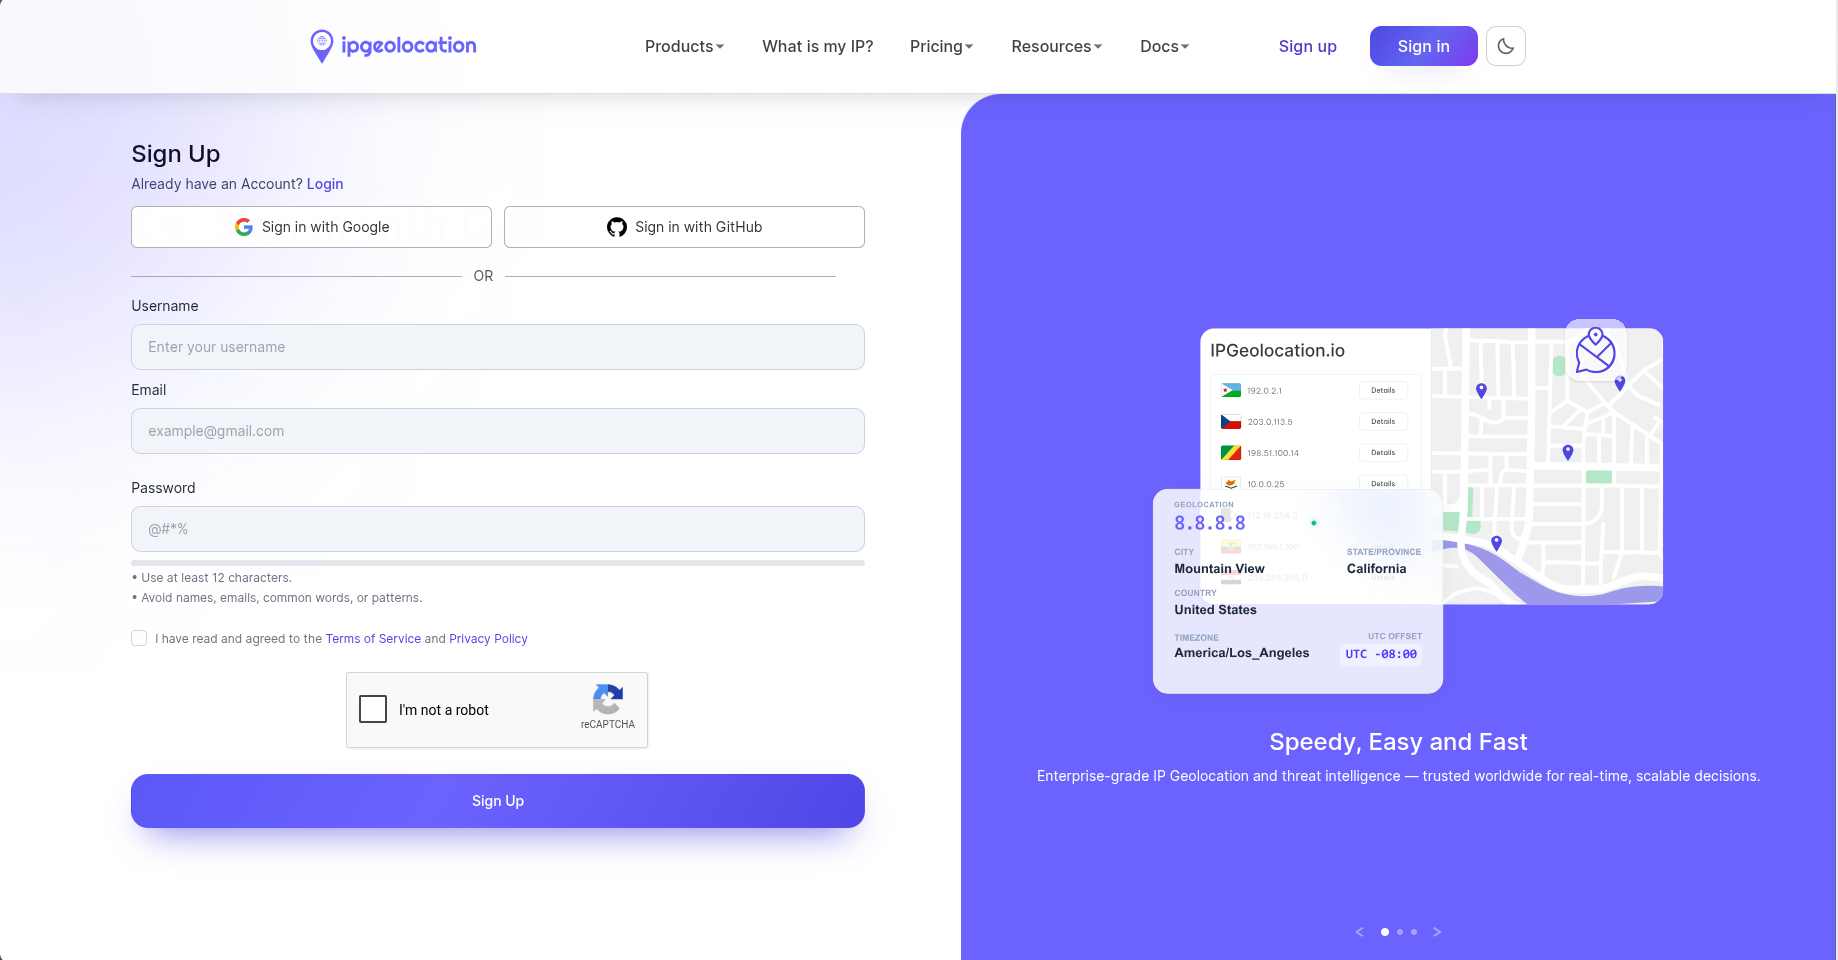
Sign up for a free account. The free plan includes 1,000 credits per day with no credit card required. Each standard geolocation lookup costs 1 credit. For higher-volume sites, paid plans start at a few dollars per month and unlock additional data modules like security intelligence, company data, and abuse contact details.
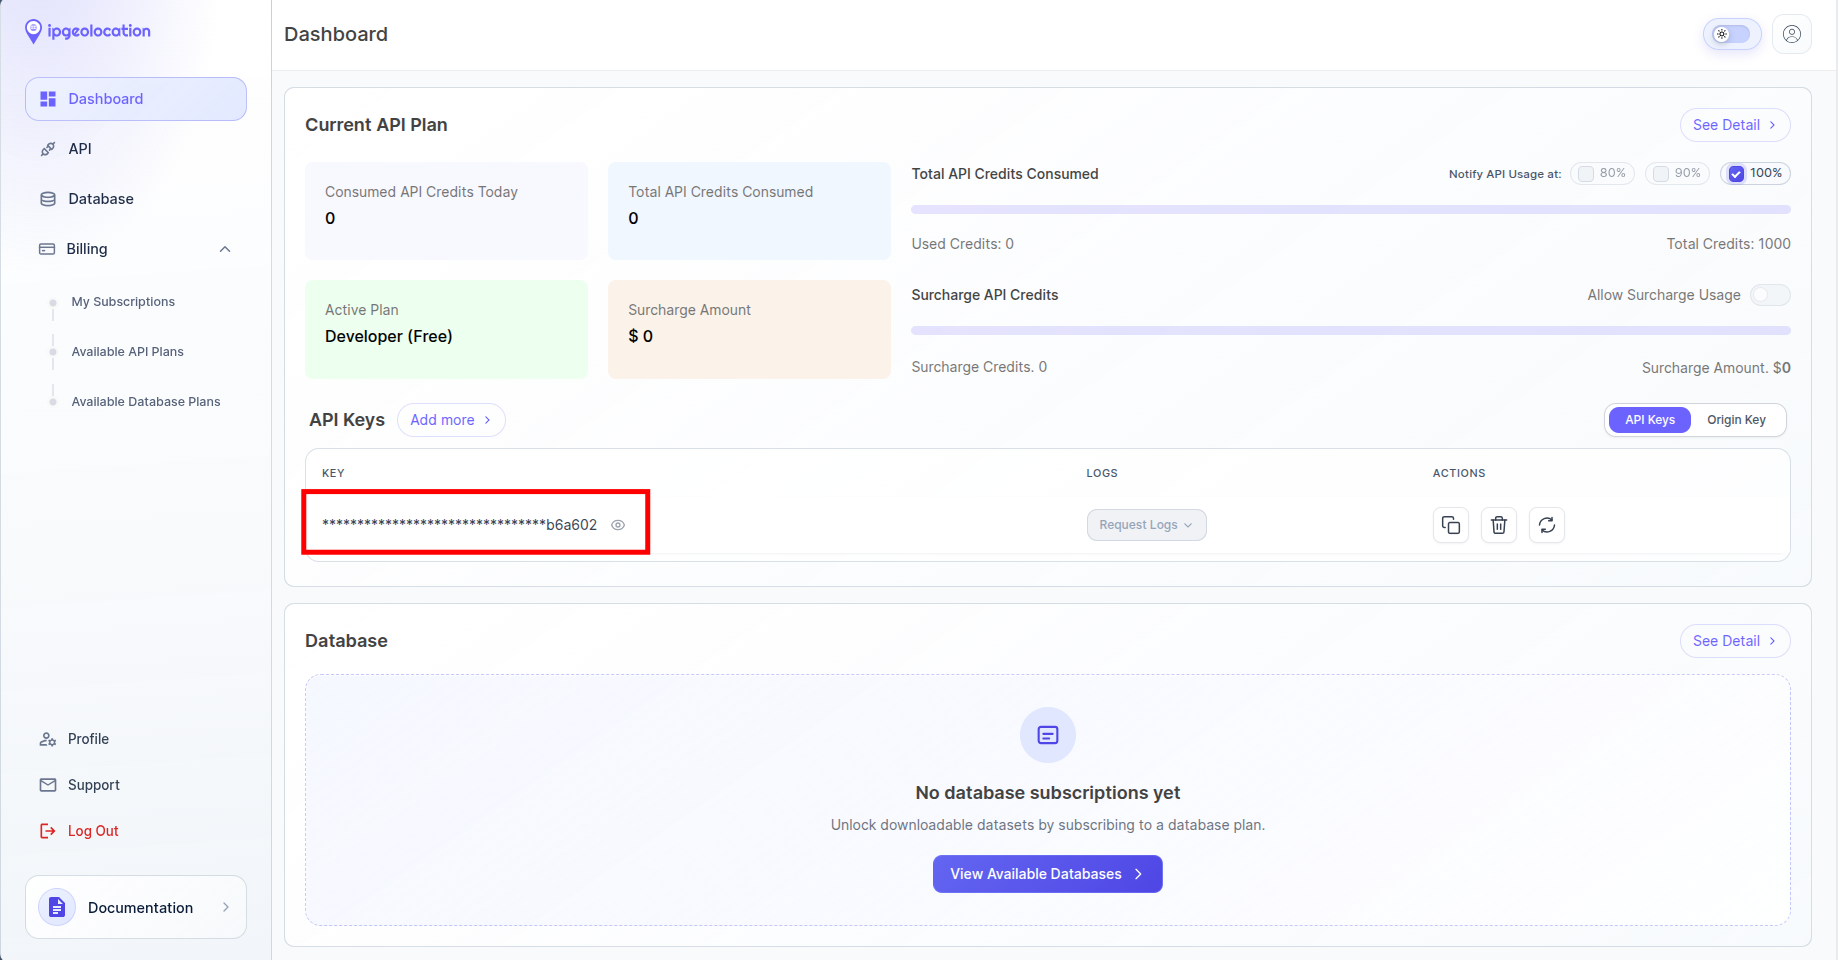
After signing up, your API key is on the dashboard. Copy it. You'll paste it into the GTM template configuration in the next step.
Securing your API key on paid plans: On the free plan, the API key is included in browser-side requests, which means it's visible to anyone inspecting network traffic. On paid plans, you can leave the API key field empty in GTM and instead restrict access through Request Origins in your dashboard. Add your domain (e.g., www.example.com), and the API will only accept calls from that origin. This keeps the key out of client-side code entirely.
Install the Template from the Gallery
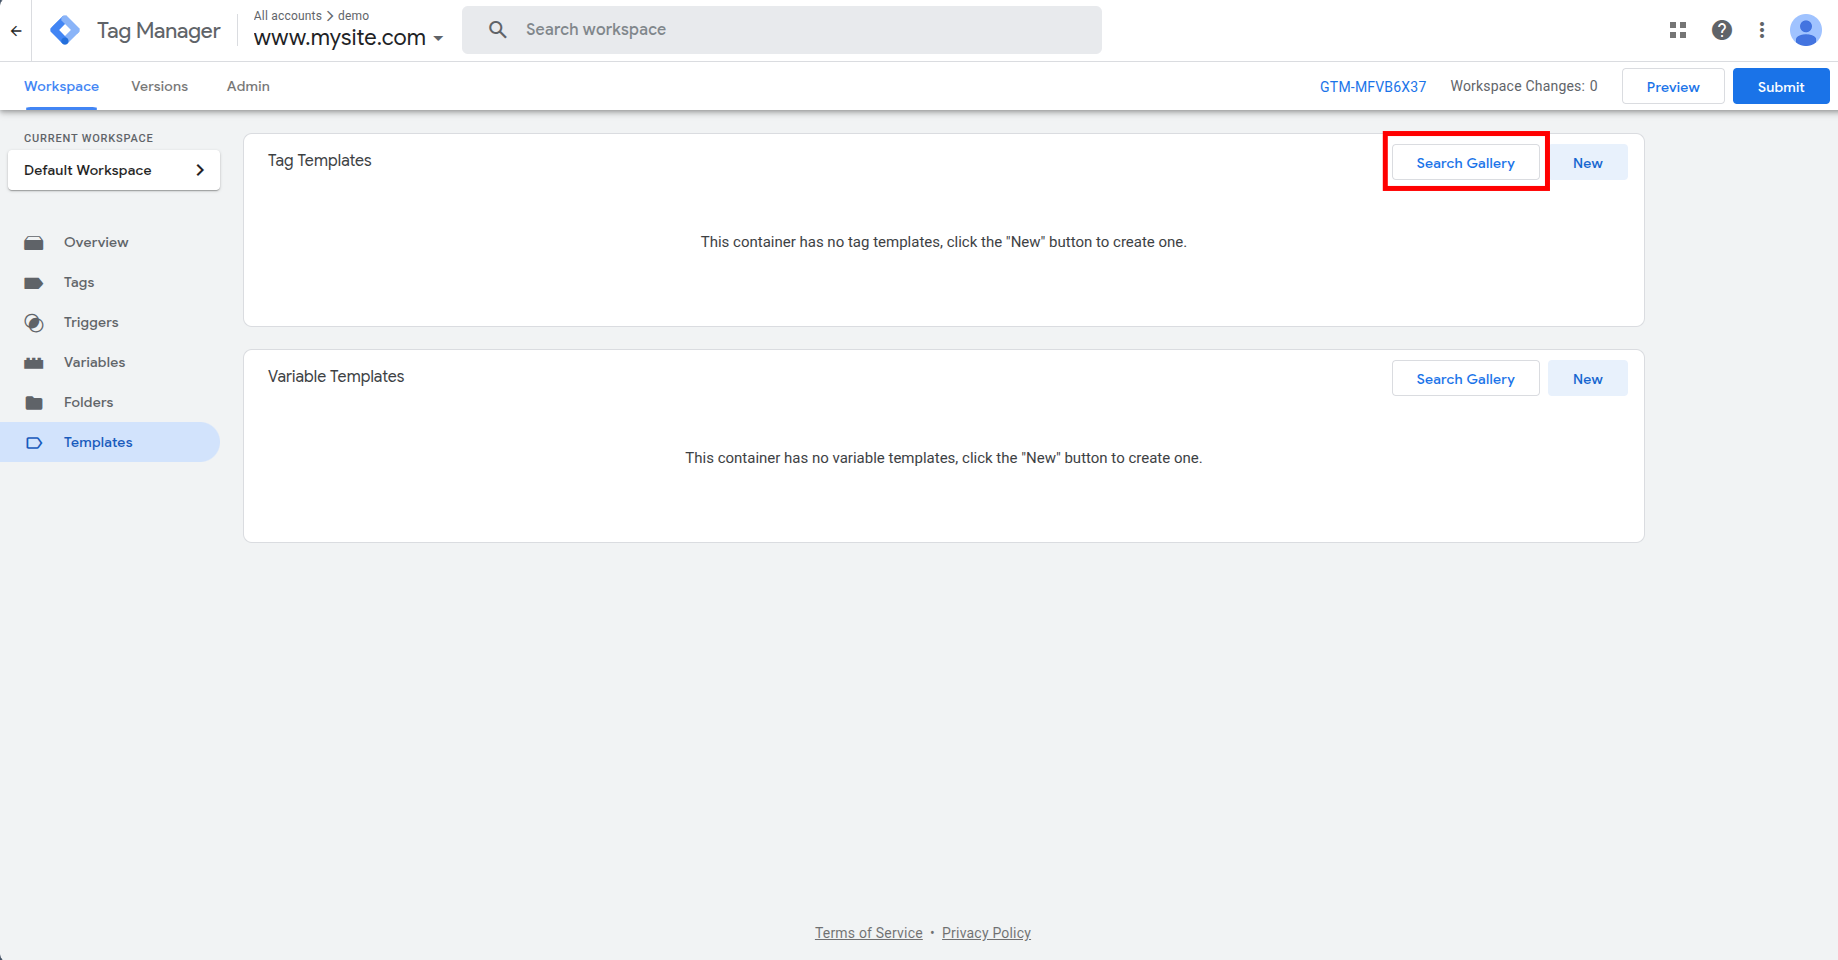
Open your GTM container and go to Templates in the left sidebar. Under Tag Templates, click Search Gallery.
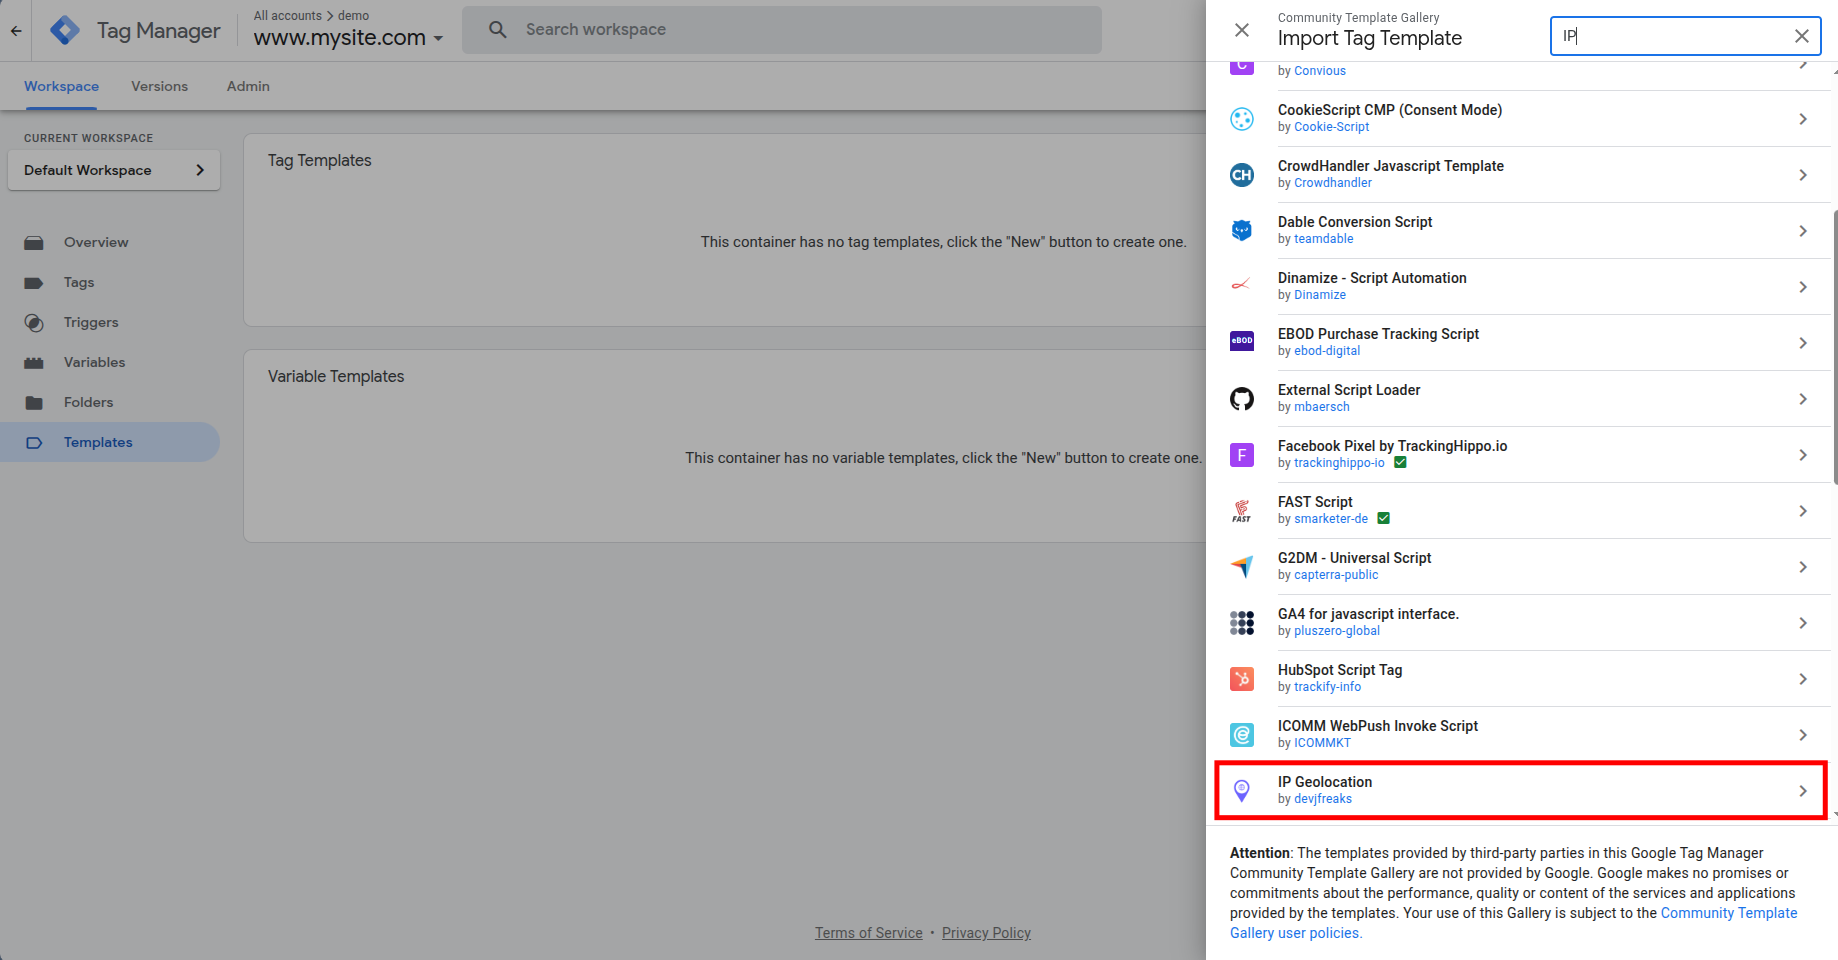
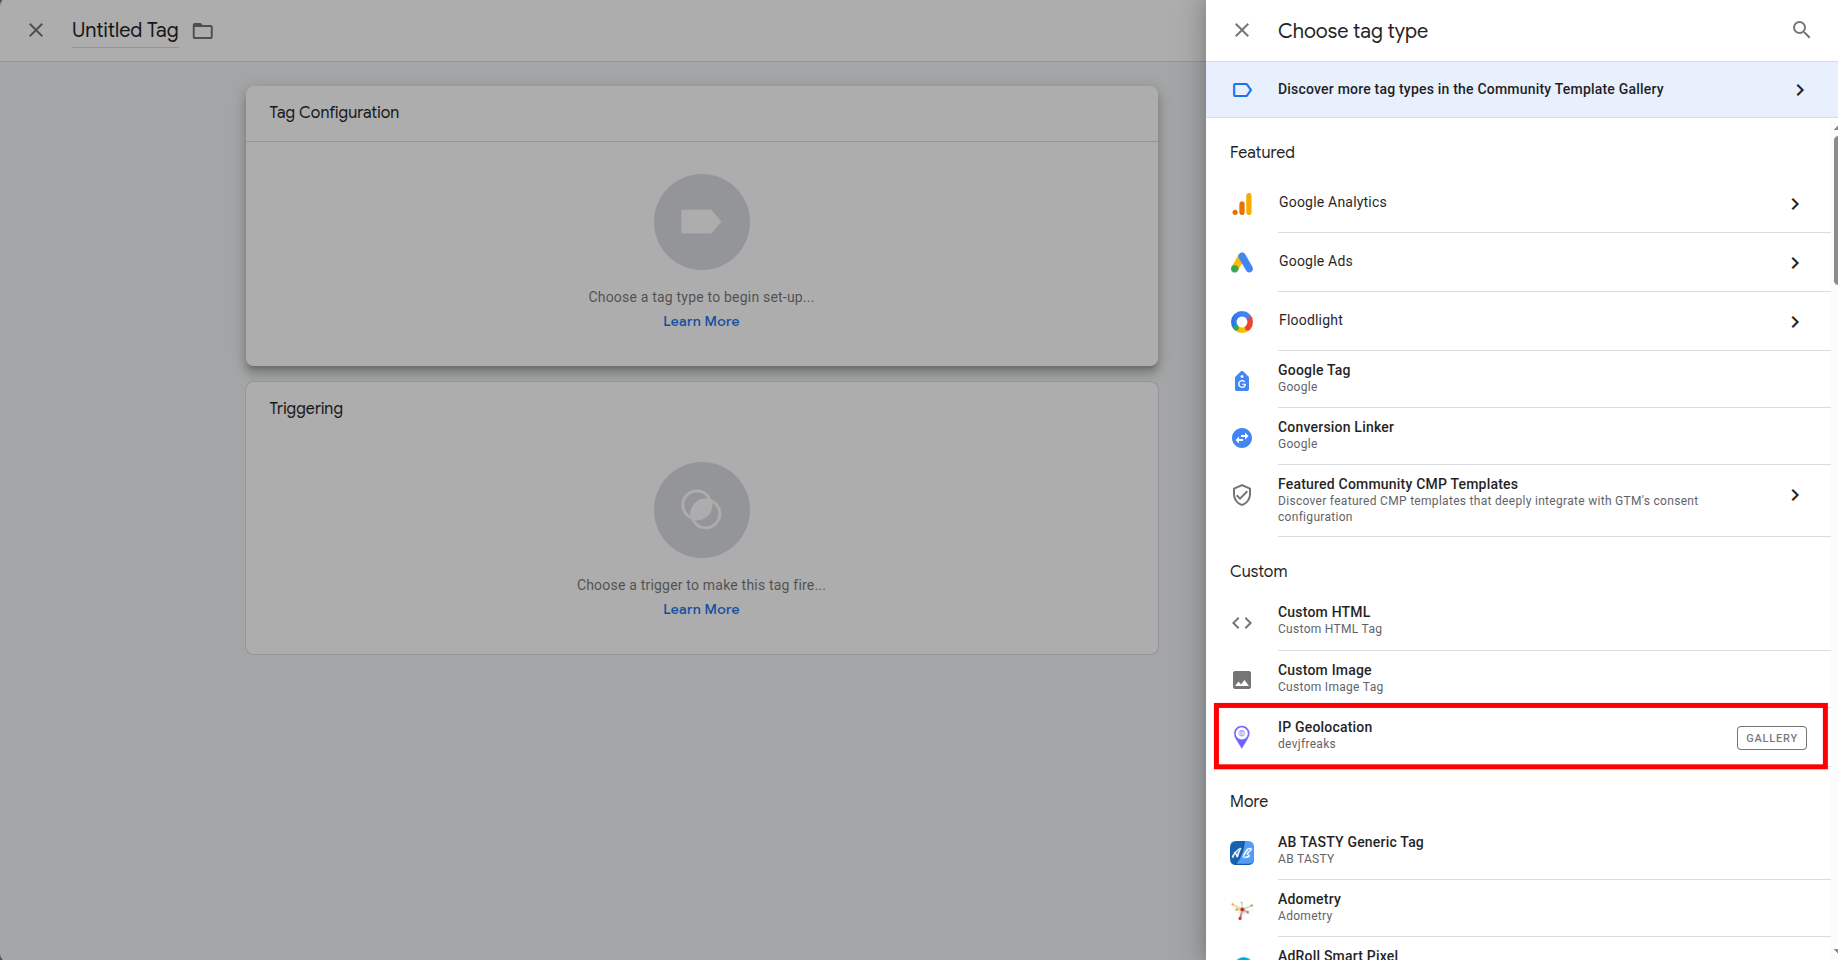
In the gallery search bar, type IP Geolocation. Select the template by devjfreaks (this is the official ipgeolocation.io template, built for the v3 API).
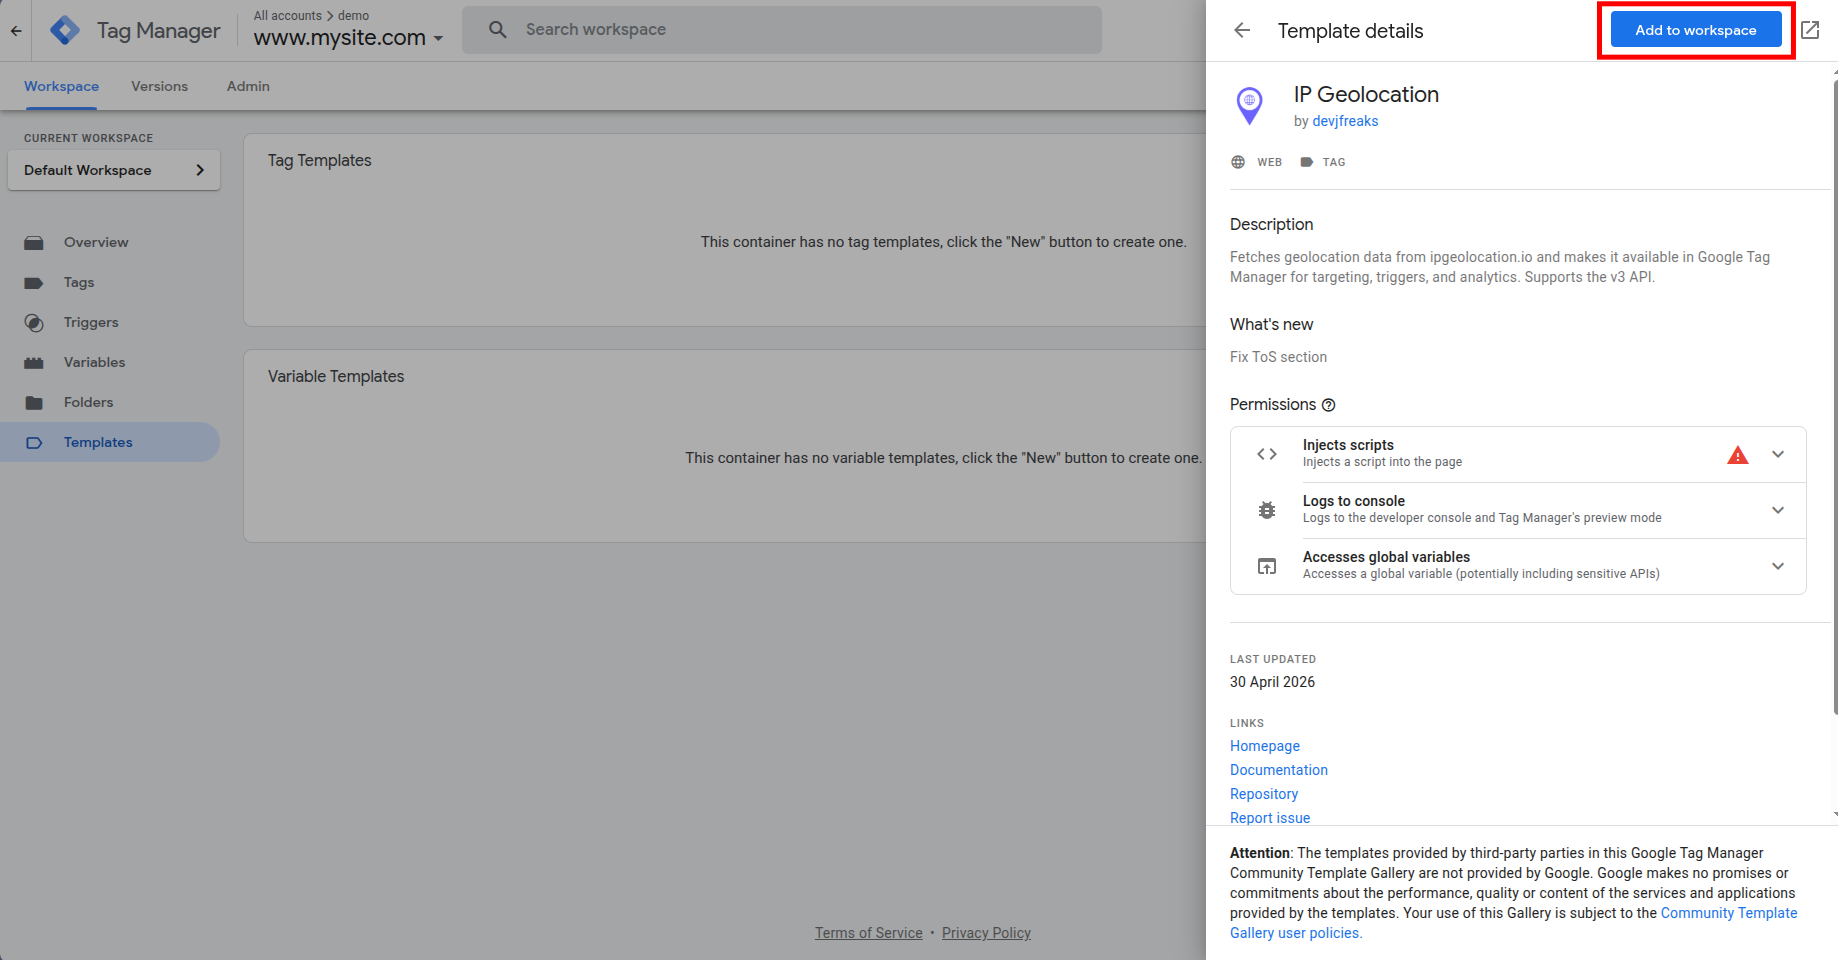
Click Add to workspace to import the template into your container.
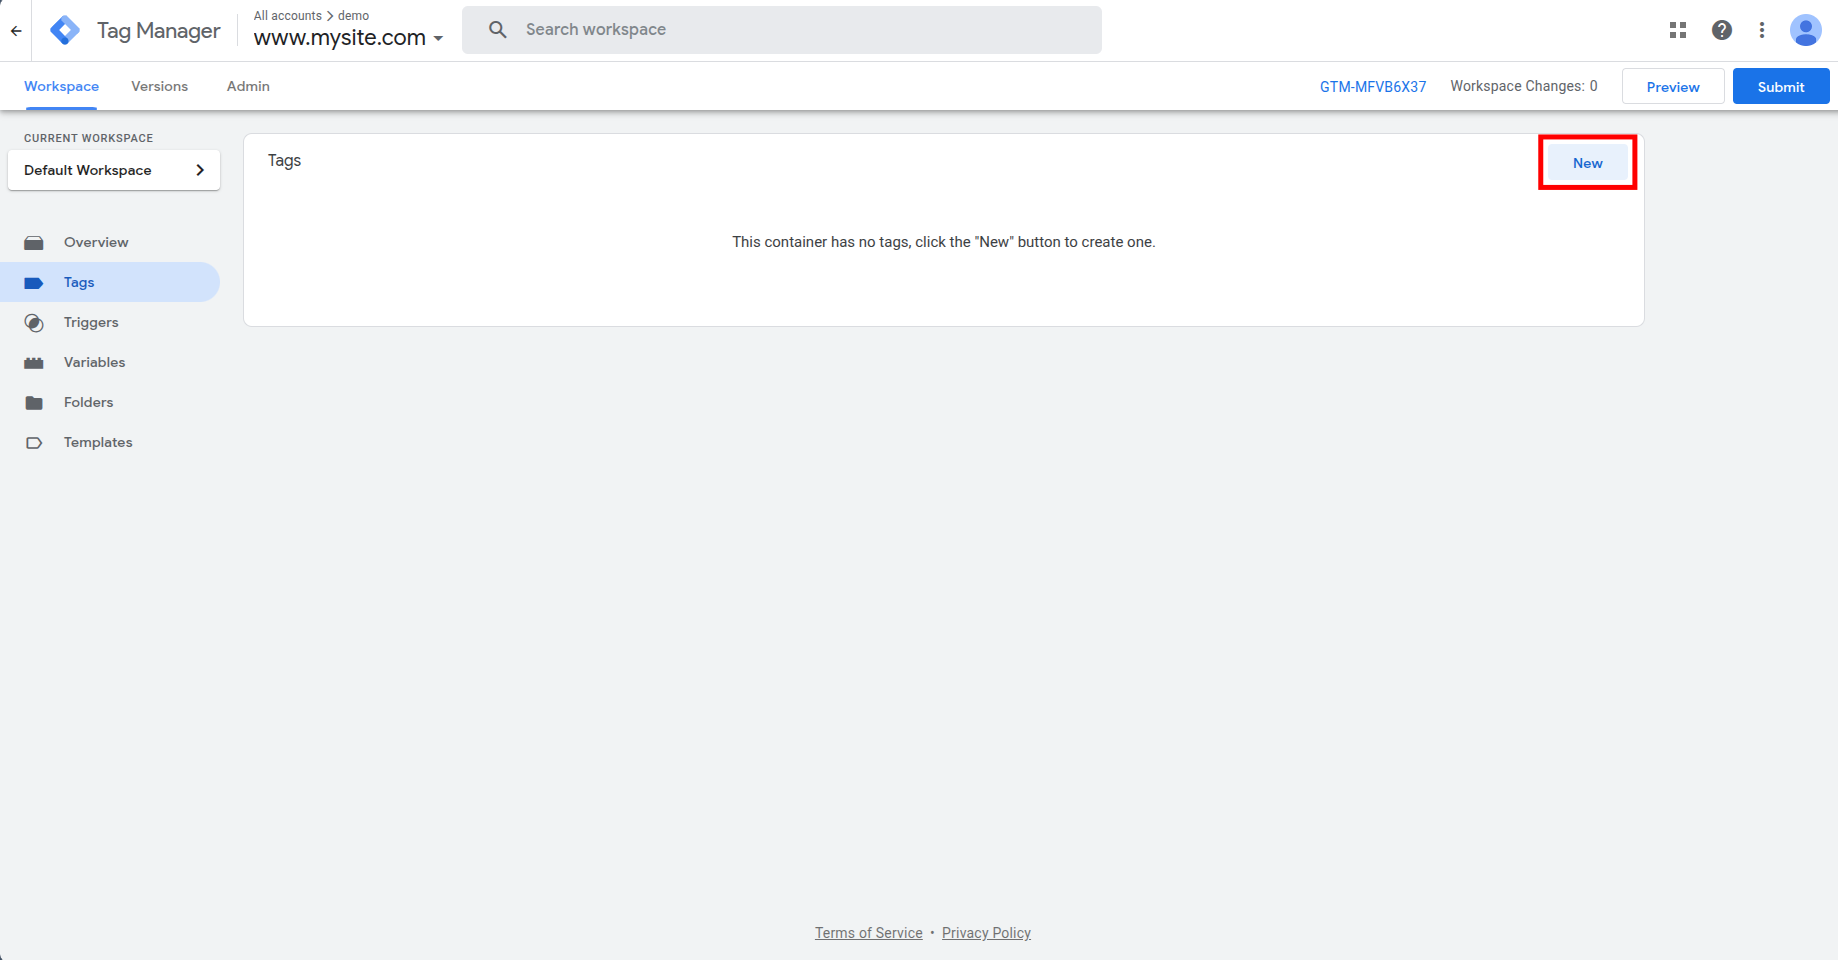
Now go to Tags in the left sidebar and click New to create a tag.
Click Tag Configuration, and in the side panel that appears, select IP Geolocation from your custom templates.
Configure the Tag
1. API Key and Session Storage
Paste your API key from the ipgeolocation.io dashboard into the API Key field.
Enable Session Storage to cache the geolocation response in the visitor's browser session. This prevents duplicate API calls on subsequent page views within the same session, which reduces credit usage and improves page load performance.
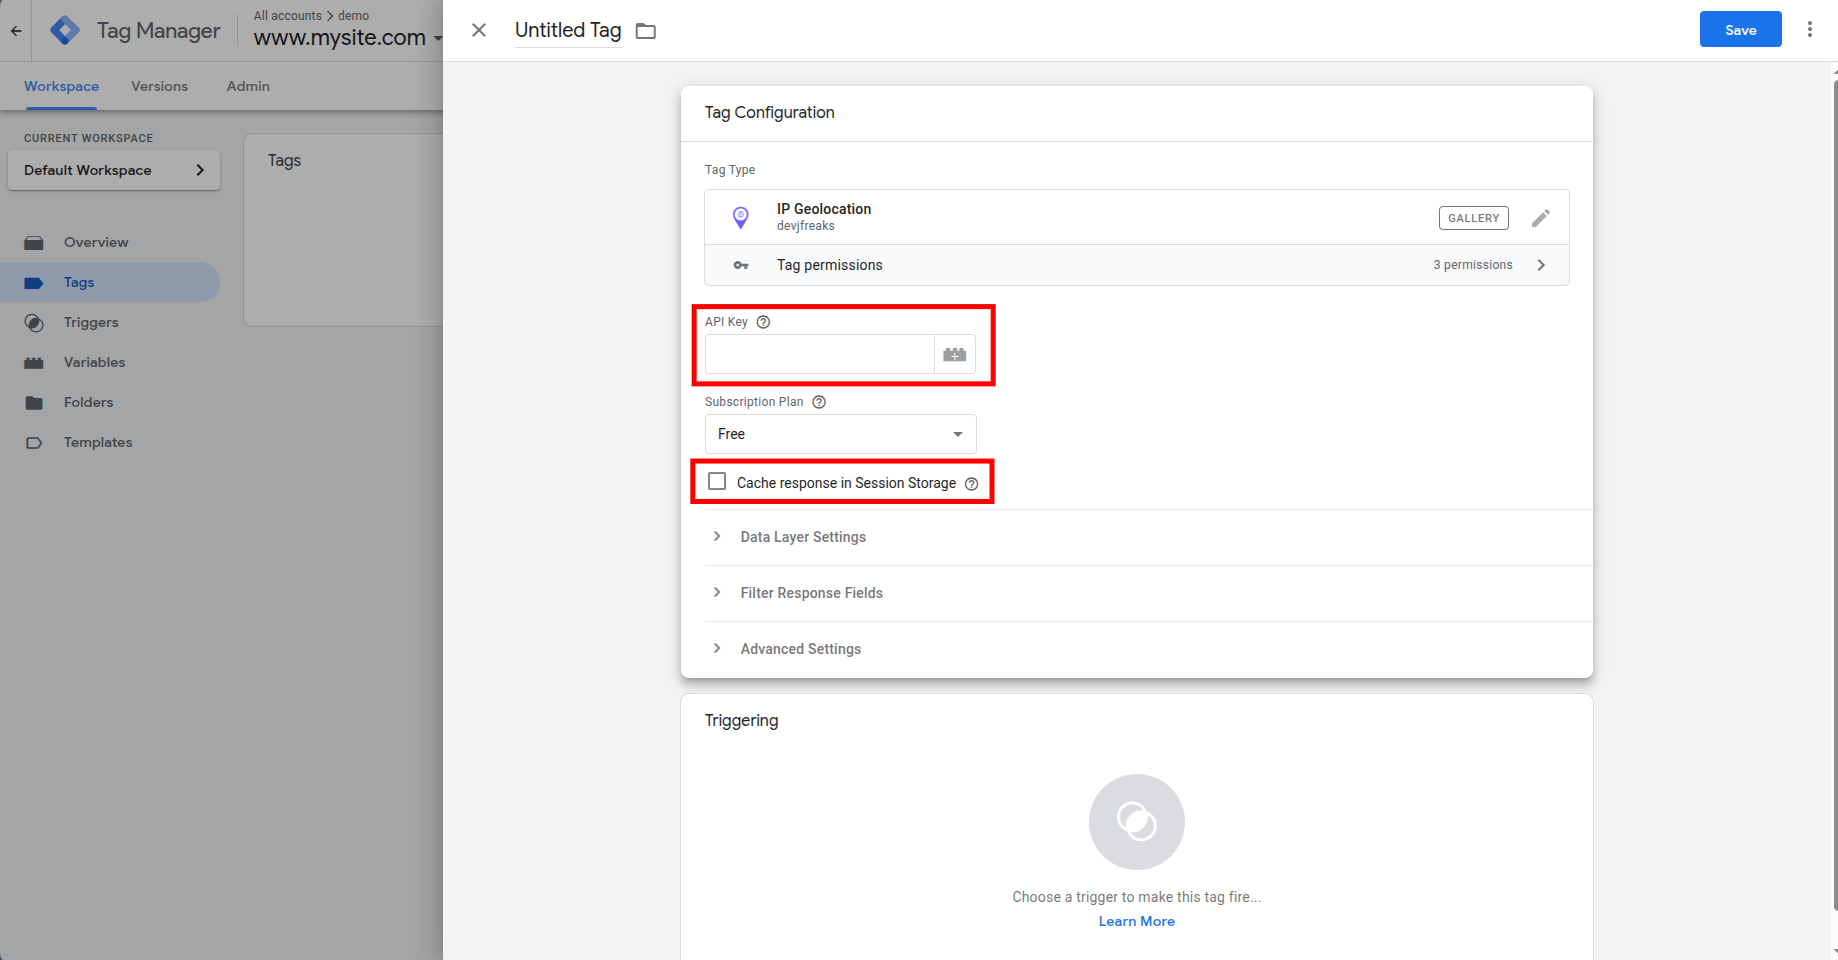
On paid plans with Request Origins configured, you can leave the API key field blank.
2. Subscription Plan
Use the dropdown to select your plan type:
Free returns core geolocation data: IP, country, city, state, latitude, longitude, timezone, currency, and country metadata. You can filter the response using the Fields to Include and Fields to Exclude options.
Paid unlocks additional data modules. When you select Paid, a new configuration section appears with these options:

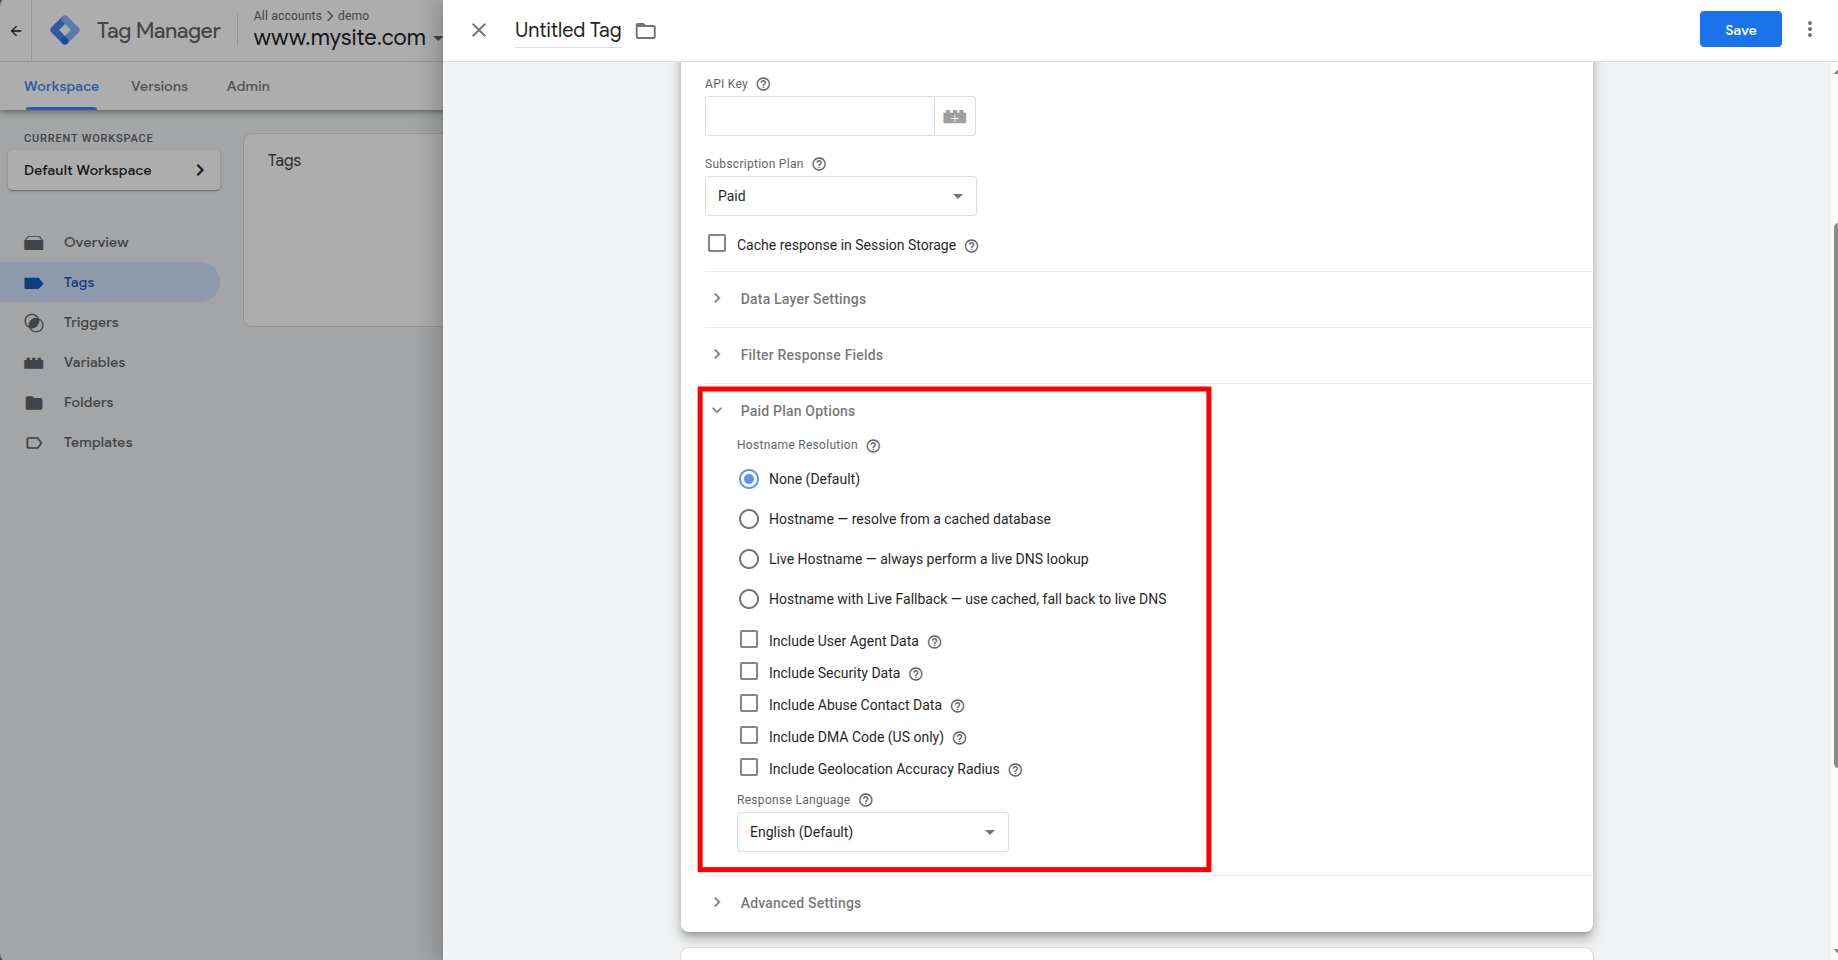
3. Paid Plan Options
Hostname Resolution controls how the IP's hostname is resolved. "None" skips the lookup entirely. "Hostname" resolves from a cached database (fast but may not reflect recent DNS changes). "Live Hostname" performs a real-time DNS lookup (most accurate, adds latency). "Hostname with Live Fallback" uses the cache first and falls back to live DNS if nothing is found.
Include User Agent Data parses the visitor's User-Agent header and returns structured browser and OS details.
Include Security Data returns threat intelligence flags: VPN detection, proxy detection, Tor exit node, bot classification, and crawler identification. Useful for fraud prevention and compliance workflows.
Include Abuse Contact Data returns the abuse contact (name, email, address) for the IP's network, which is relevant for security teams investigating suspicious traffic.
Include DMA Code (US only) returns the Nielsen Designated Market Area code for US-based IPs. Useful for ad targeting aligned with broadcast media markets.
Include Geolocation Accuracy Radius returns an estimated accuracy radius in kilometers for the IP's coordinates.
Response Language translates location names (country, city, state) into your preferred language. Available languages include German, French, Spanish, Japanese, Chinese, Russian, Italian, Korean, Portuguese, Czech, and Persian. Defaults to English.
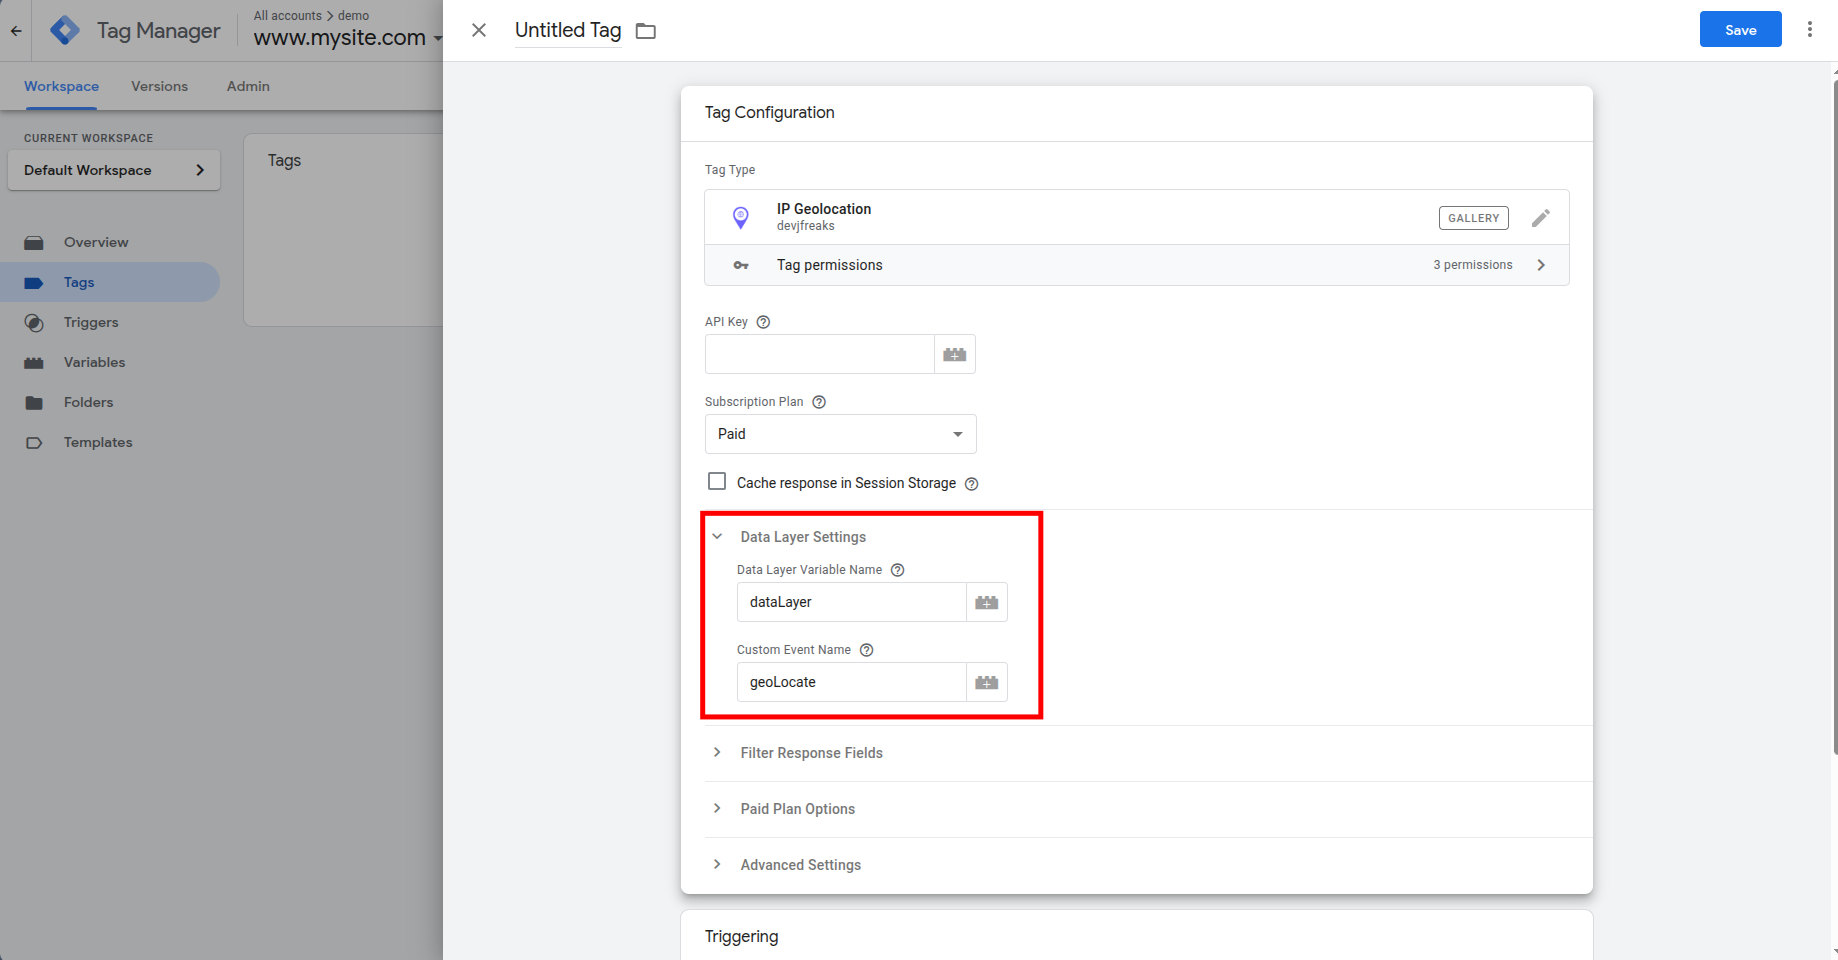
4. Data Layer Settings
Two fields control how the geolocation data is pushed into the data layer:
Data Layer Variable Name defaults to dataLayer. If your site uses a custom data layer name (e.g., myDataLayer), change it here.
Custom Event Name defaults to geoLocate. This is the event name you'll use in Custom Event triggers to fire geo-dependent tags.
If you change the data layer name, you also need to update it in the template permissions. Go to Templates > IP Geolocation the Template Editor will be opened, open Permissions > Accesses global variables, and replace dataLayer with your custom name. If these values don't match, the tag will fail silently.

5. Filter the API Response
You don't always need the full response. Two fields let you control which data comes back:
Fields to Include limits the response to specific fields. For example, entering location returns only the location object. Entering location.country_name returns just the country name. The IP address is always included automatically.
Fields to Exclude removes fields you don't need. For example, entering currency strips the currency object from the response.
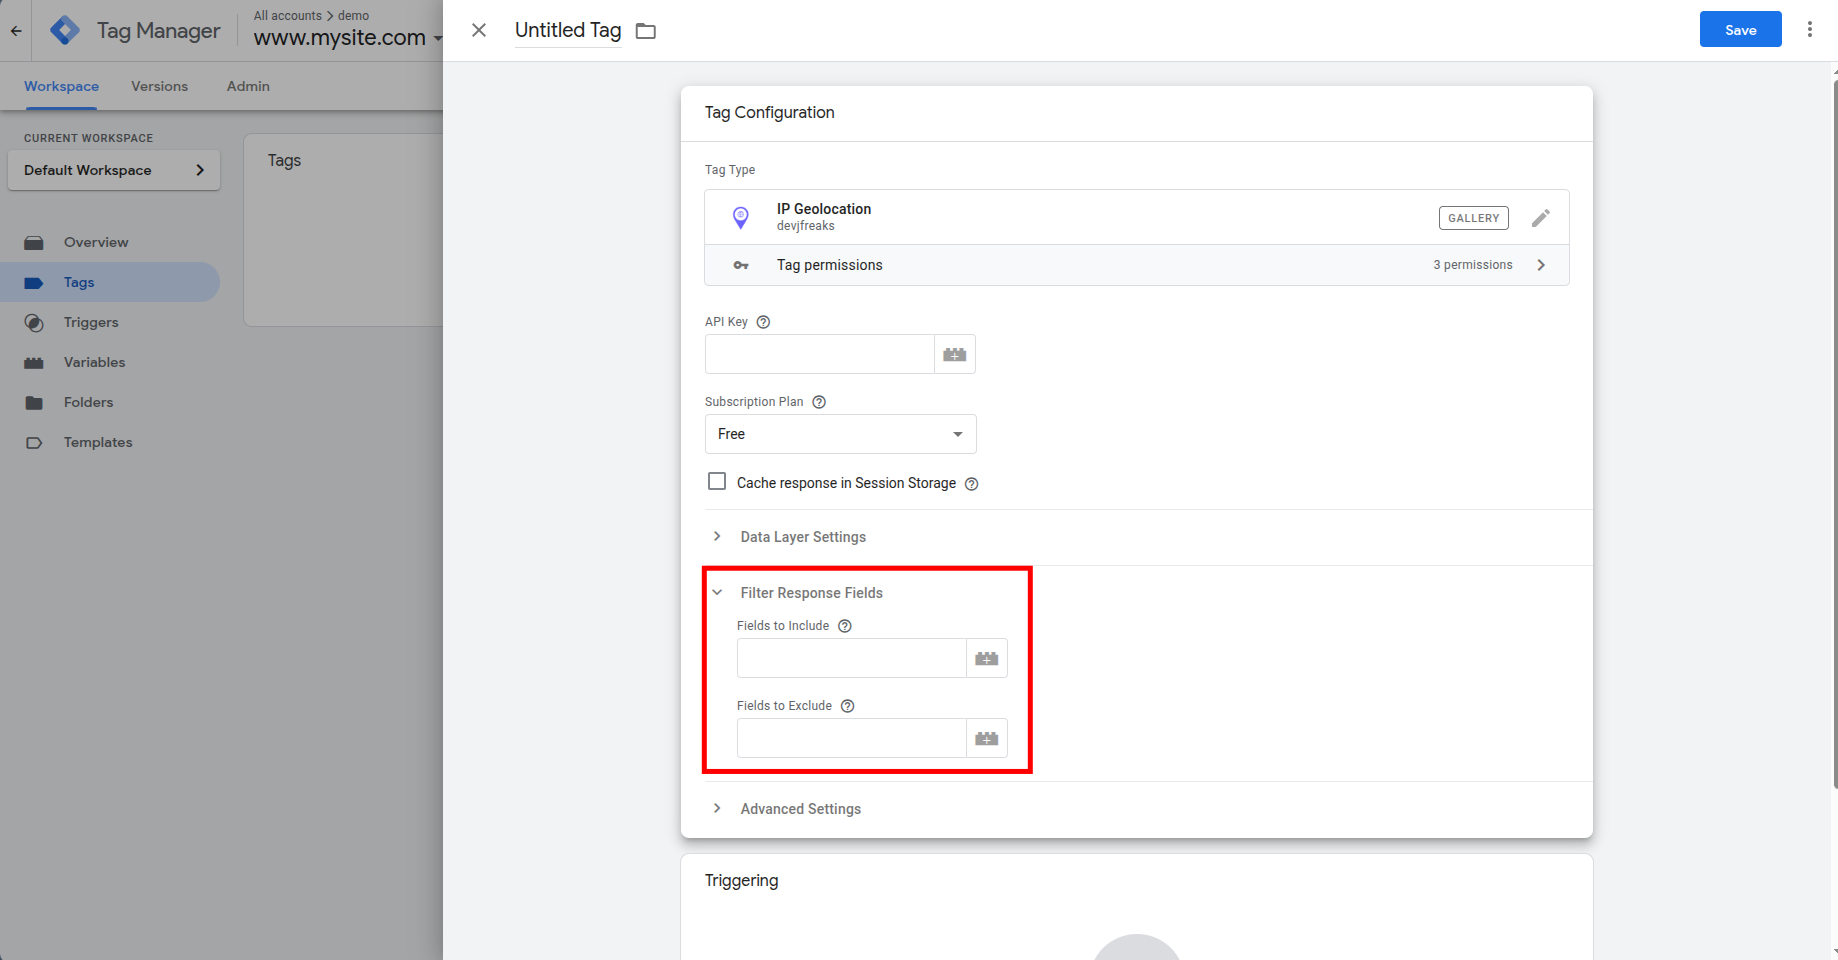
Filtering is worth doing. Smaller responses mean less data pushed into the data layer and marginally faster processing. If you only need country and city for ad targeting, exclude everything else.
For the full list of filterable fields, see the API filtering documentation.
6. Set the Trigger
Choose when the tag should fire. All Pages is the recommended default for most setups. With session storage enabled, the API is only called once per session regardless of how many pages the visitor loads.
If you want to defer the call, use a Window Loaded trigger instead. For single-page applications or specific landing pages, create a custom trigger that matches your requirements.
Using IP Geolocation Data in GTM
Once the tag fires, it pushes geolocation data into the data layer as a geoData object, using the event name you configured (default: geoLocate). From here, you can use the data in triggers, variables, and other tags.
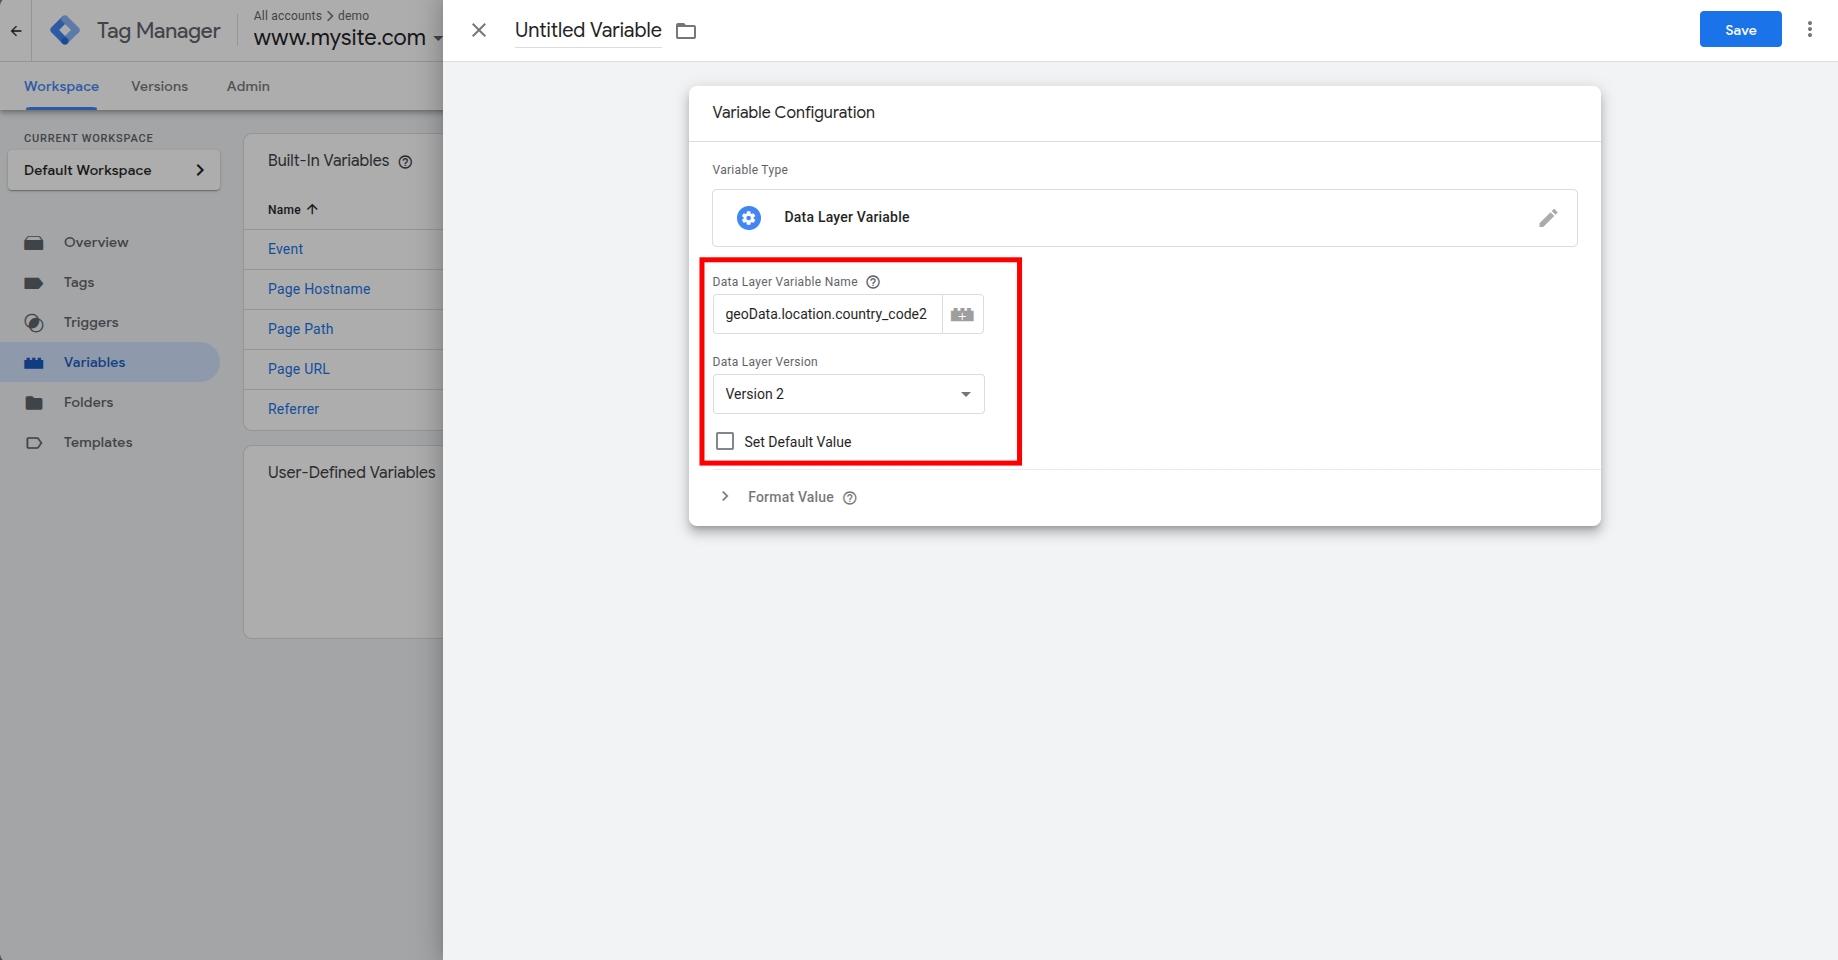
1. Create Data Layer Variables
To access specific fields from the geoData object, create Data Layer Variables in GTM.
Country: Set the variable name to geoData.location.country_code2.
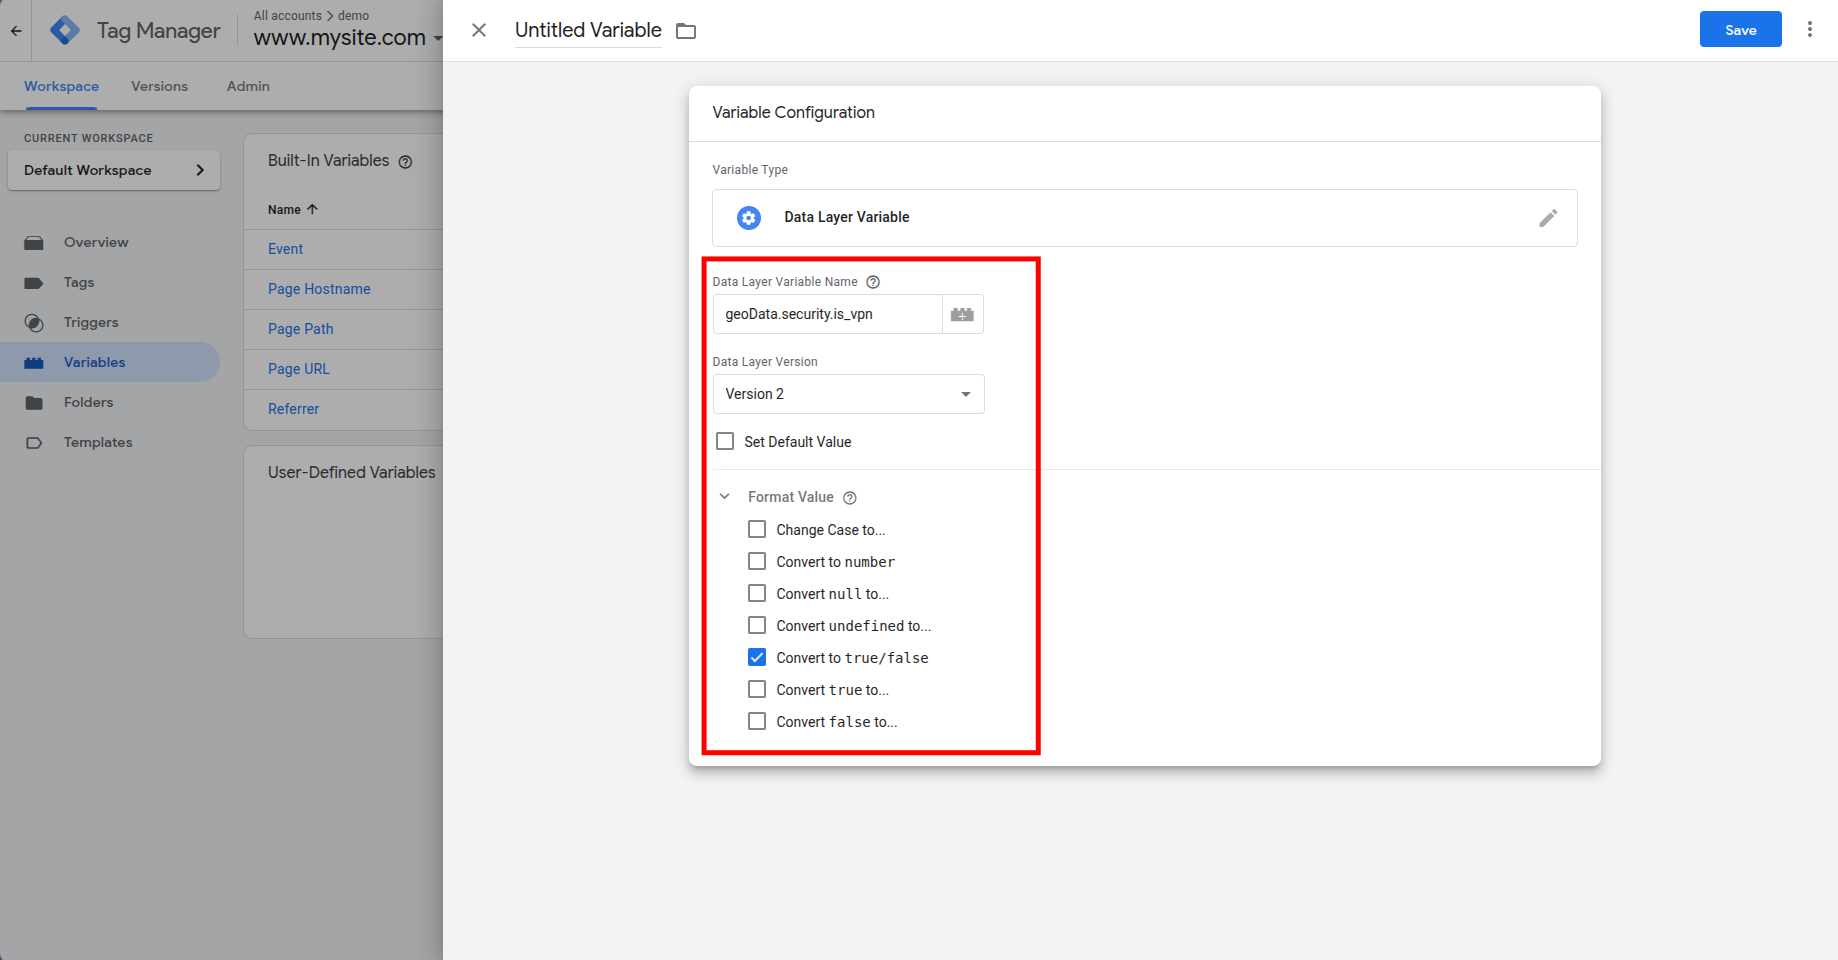
Vpn: Set the variable name to geoData.security.is_vpn.
Other commonly used variables include geoData.location.country_name, geoData.location.city, geoData.location.country_code2, and geoData.currency.code.
2. Create a Custom Event Trigger
To fire tags only after geolocation data is available, create a Custom Event trigger with the event name geoLocate.
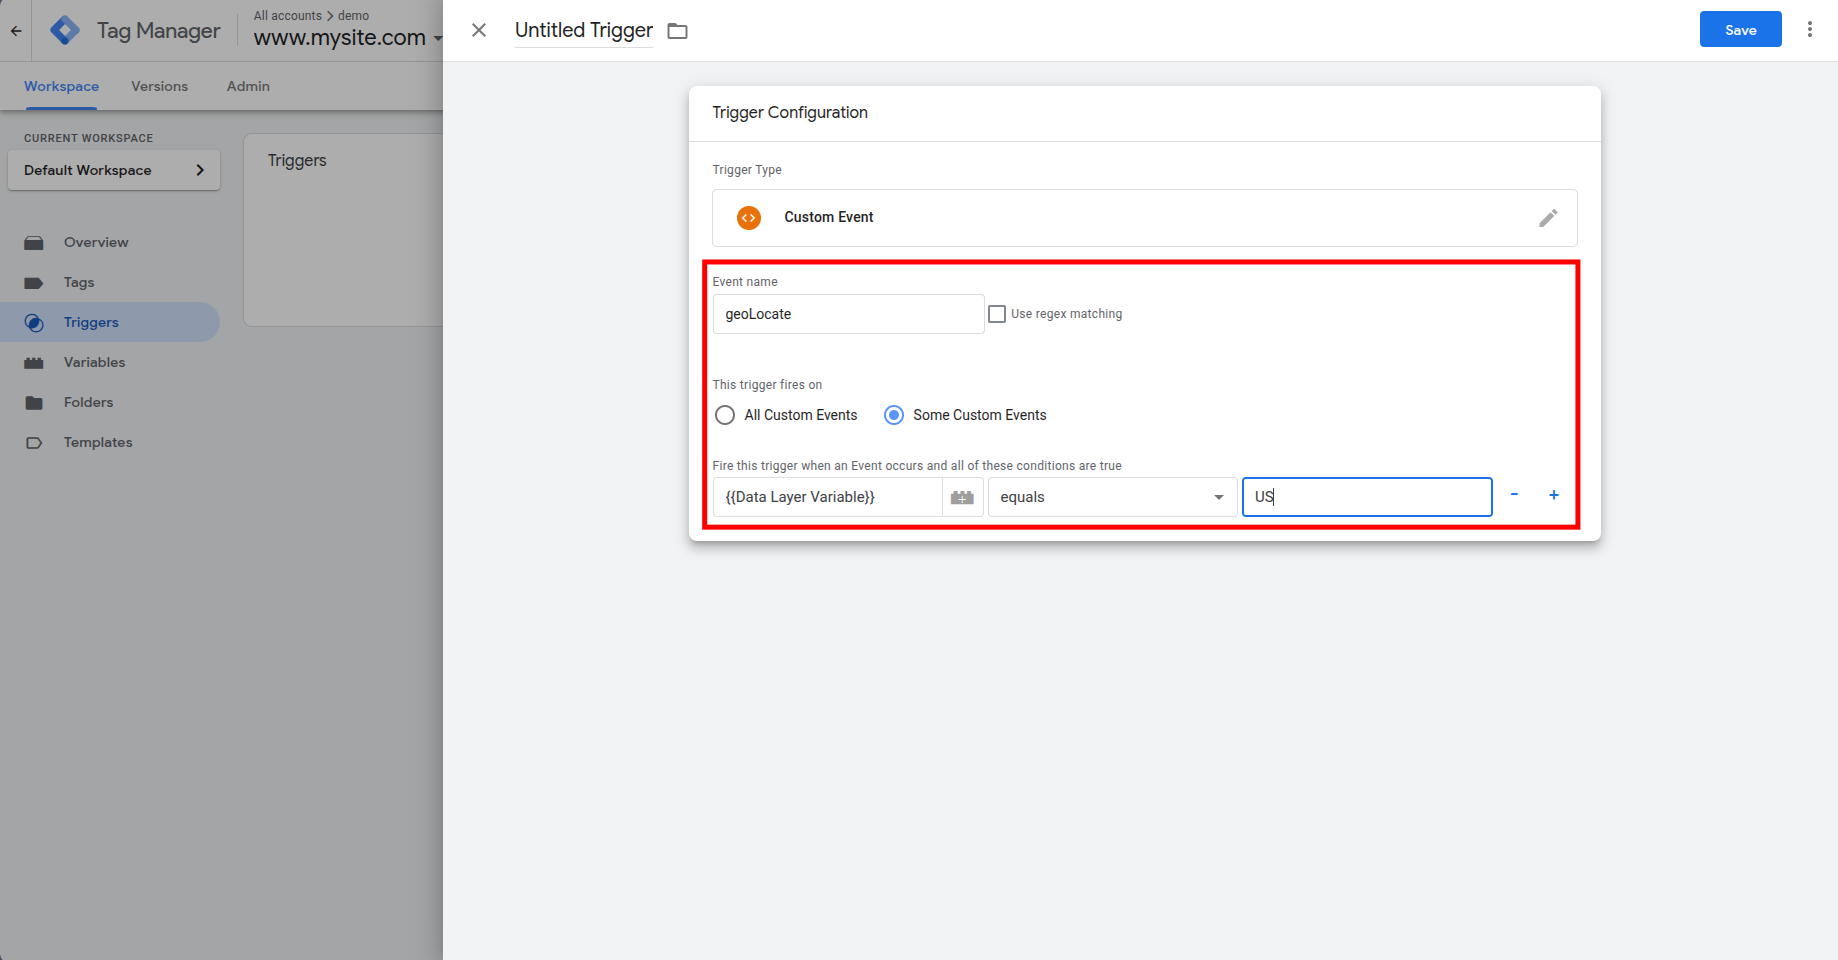
Any tag that depends on geolocation data (remarketing pixels, consent banners, analytics events) should use this trigger instead of All Pages. This guarantees the geo data exists in the data layer before your tag tries to read it.
3. Practical Use Cases
Geo-targeted remarketing: Fire a Meta or Google Ads remarketing tag only for visitors from specific countries. Add a condition to your trigger: fire when geoData.location.country_code2 equals US (or whichever market you're targeting).
Region-specific consent logic: Use the country code variable to load different consent banners for EU vs. non-EU visitors. This lets you apply stricter consent flows where GDPR applies without burdening visitors in regions with lighter requirements.
Internal traffic filtering: If your team connects through a known IP range, compare geoData.ip against your office IPs using a Custom JavaScript variable. Flag matching visitors as internal traffic and exclude them from analytics or ad tags. Here's an example Custom JavaScript variable that returns true for internal IPs:
function() {
  var ip = {{DLV - geoData.ip}};
  if (!ip) {
    return false;
  }

  // Replace with your actual office IP addresses
  var internalIPs = [
    '203.0.113.10',
    '203.0.113.11',
    '198.51.100.25'
  ];

  return internalIPs.indexOf(ip) !== -1;
}
Name this variable something like "CJS - Is Internal Traffic" and use it as an exception condition on your analytics and ad tags.
GA4 events with location context: Fire a GA4 event tag on the geoLocate trigger and pass geoData.location.country_name and geoData.location.city as event parameters. This gives you location data tied to specific user actions, independent of GA4's built-in geo reporting.
Currency and language detection: Use geoData.currency.code and geoData.location.languages to auto-select a default currency or language on e-commerce sites, then pass the value to your storefront via a data layer push or custom JavaScript.
4. Security Use Cases (Paid Plans)
When you enable Include Security Data in the template configuration, the geoData.security object opens up a separate set of use cases around fraud prevention and traffic quality. These require a paid plan and cost 2 additional credits per lookup.
VPN and proxy detection for form protection: Check geoData.security.is_vpn or geoData.security.is_proxy before submitting lead forms. If the visitor is behind a VPN or proxy, you can suppress the form submission tag, fire a different tag that routes the lead to a manual review queue, or add a CAPTCHA step. This reduces junk leads from automated scrapers and fraudulent signups without blocking all anonymous traffic outright.
Threat-score-based tag gating: Use geoData.security.threat_score to control which tags fire based on IP risk. Create a Custom JavaScript variable that reads the score and returns a risk tier:
function() {
  var score = {{DLV - geoData.security.threat_score}};
  if (typeof score !== 'number') {
    return 'unknown';
  }

  if (score >= 80) {
    return 'high';
  }
  if (score >= 45) {
    return 'elevated';
  }
  if (score >= 20) {
    return 'medium';
  }
  return 'low';
}
Name this variable "CJS - Threat Risk Tier" and use it in trigger conditions. For example, block your checkout conversion tag from firing when the tier is high, or fire a fraud-logging tag when the tier is elevated or above.
Bot filtering for analytics accuracy: If geoData.security.is_bot is true, block your GA4 or other analytics tags from firing. This removes bot traffic from your analytics data at the source, before it pollutes your pageview counts, conversion rates, and funnel metrics. Create a trigger exception where geoData.security.is_bot equals true and apply it to your analytics tags.
Flagging anonymous or Tor traffic: Combine geoData.security.is_tor and geoData.security.is_anonymous to identify visitors using Tor or other anonymization tools. Depending on your risk tolerance, you can log these sessions for review, suppress personalization tags, or block specific flows like account creation and checkout.
A Note on Accuracy and Privacy
IP-based location tracking is not GPS-level precision. It resolves location from the IP address assigned by the visitor's ISP, which means accuracy varies. City-level resolution is typical for fixed broadband connections. Mobile IPs and VPN users will often resolve to a different city or region entirely.
For this reason, don't tie critical UX decisions (like hard redirects or price changes) solely to IP geolocation. Use it for targeting, reporting, default selections, and compliance checks where approximate location is good enough.
On the privacy side, IP addresses are considered personal data under GDPR and similar regulations. If your site serves EU visitors, make sure your cookie consent and privacy policy account for the fact that a third-party API (ipgeolocation.io) is receiving the visitor's IP address. The template fires a client-side API call, so standard consent mechanisms in GTM (like blocking tags until consent is granted) apply here the same way they would for any other third-party tag.
FAQ
Yes. The template pushes data into the GTM data layer, which is independent of your analytics platform. Create Data Layer Variables for the fields you need, then reference those variables in your GA4 event tags as event parameters or user properties.
On the free plan, yes. The API call runs client-side, so the key is visible in browser network tools. On paid plans, you can secure it by configuring Request Origins in your ipgeolocation.io dashboard and leaving the API key field blank in GTM.
With session storage enabled (recommended), one API call per session. The geolocation response is cached in the browser's session storage after the first page view. Subsequent pages within the same session reuse the cached data without making another API request, which keeps credit usage low on multi-page visits.
This template is designed for web (client-side) GTM containers. For server-side GTM, you would call the IP Geolocation API directly from a custom client or tag in your server container. Server-side has the advantage of keeping the API key completely hidden from the browser.